Making the Best of Things
Warm weather means the start of garage sale season! Before we had kids we were pretty die hard garage salers. We would plan a route, get up early (on a Saturday!). Half or more of our current furniture we got at garage sales. We don't get to go that often anymore, but once in a while we stumble upon one. One of the things I've learned about finding a good deal at a yard sale is sometimes you have to see the possibilities beyond what something is. More than that, you have to weigh whether you have the time and resources to reach that possibility, and if it's worth it. Sometimes it's not, but sometimes it is! Here's a steal that turned out pretty awesome.
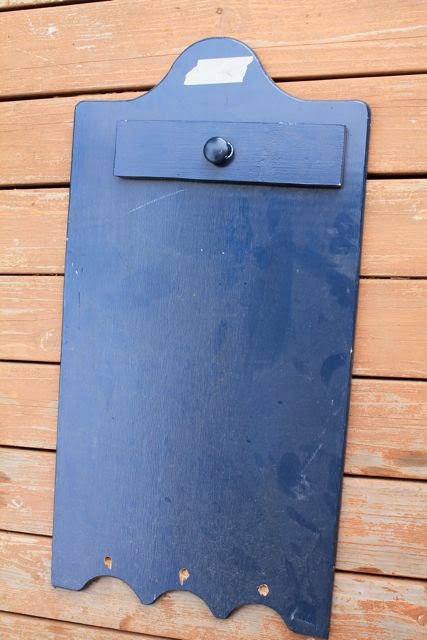
I got this thing at a sale for $1. Not really sure what it was supposed to be. It had dowel knobs where you see those three holes at the bottom, but they were all broken/unusable. The top drawer thing was just decorative I guess. Anyway, for $1 I thought just a little work could make this something useful...or maybe two useful things!


Then we (meaning my husband), drilled holes for the other four knobs and screwed them all into place.


I got this thing at a sale for $1. Not really sure what it was supposed to be. It had dowel knobs where you see those three holes at the bottom, but they were all broken/unusable. The top drawer thing was just decorative I guess. Anyway, for $1 I thought just a little work could make this something useful...or maybe two useful things!
I started by letting it sit in the garage for five years removing the top drawer-like piece and the knob that was on it. I sanded and painted it, using a $0.50 oops paint from Home depot. I LOVE oops paint. I bought these knobs on clearance for $1-$2 each.
I did a thin coat of paint because I liked the look of the blue underneath; kind of distressed.
Then we (meaning my husband), drilled holes for the other four knobs and screwed them all into place.
And my new necklace holder was finished. Total cost about $7. Wondering where you can find most of these beautiful necklaces for yourself? Well I'm glad you asked! Mercy House is here and Musana is here. Go buy some, they are super cute and super great organizations.
Now, for the rest of my $1 purchase. I decided to make the back into a big chalk board. I painted it with the rest of the $0.50 paint sample, then taped off the edges before chalk board spray painting the center.
I still had the three holes at the bottom, so I bought a piece of trim at Home Depot and cut it to size. I think it was $1-$2 for like a 6 or 8 foot piece. I painted it red for a pop of color and then used finishing nails to secure it in place (first I tried wood glue but it didn't hold). Make sure to let your chalk board paint cure and then rub it down well with chalk before using. This project only cost about $2 total.
It's really satisfying to make something cute and useful out of something that was cheap and ugly. It reminds me of this quote, which is one of my current favorites:
I think there's a lot of things (and people) out there who just need a little love to really shine they way they were meant to. I hope this week we can all find a way to make something the best it can be. None of us is in control of everything that happens in our lives, but all of us choose our response, our attitude, and our outlook. Let's make it a happy one!
You are loved, Friends!!
-Haley


Comments
Post a Comment
Comments will be posted after review