Kids Play Grill
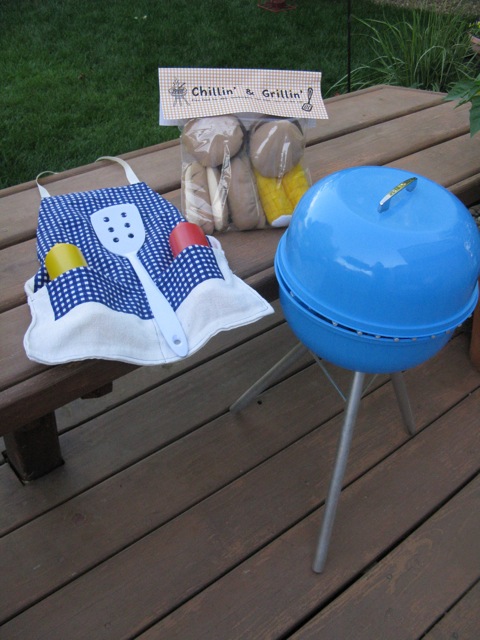
Last summer I saw this kids play grill at Apartment Therapy and fell in love with it. When I saw these plastic bowls in the dollar spot at Target I had the motivation I needed to start the project. We had a little friend with a birthday coming up, so I decided we would make him and Thing One each a play grill. While I love the adorable grill, it was a time consuming project and more complicated than it looked at first, so I'm really glad we (my husband helped quite a bit with this project) went ahead and made two at once. I probably would not have been motivated enough to make one for Thing One later. That said, I think this pretend grill is the cutest and it is worth making. I also made some fun BBQ stuff to go with it and later in the week I will share another felt food tutorial and a simple grilling apron tutorial too. It's going to be a fun week!
You can pop over to Apartment Therepy for the tutorial. After making two here's a few things to keep in mind: some of the measurements are based on the size of bowl she used, so you may need to make some adjustments if the size of your bowl is different (as mine was). You will also need to measure the top of the bowl and adjust all the measurements for the grill top accordingly. Just make sure the decreasing increments are the same. (For example: 2 - full length for the middle, 2 - 1/4" shorter than full length, 2 - 3/4" shorter than full length, etc. rather than using the exact measurements).
I also used two bowls for each grill so that it would have a top. I bought a cabinet handle and some very short screws. I really think having the top makes it look even more like a little Weber grill.
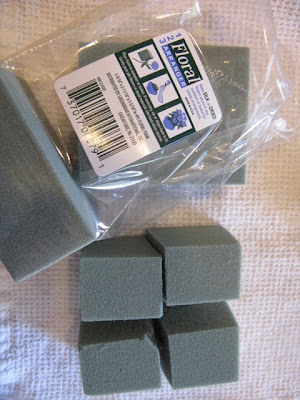
The other thing I added was some charcoal briquettes. Here's where you do what I say, not what I did. I used floral foam (for silk flowers) that I bought at the dollar store. Do not use this, it was a big mess and falls apart easily. I thought the spray paint would seal in the crumbly foam, but it didn't. Use regular styrofoam. You can use the same method as I did below though. Cut the styrofoam into two inch cubes.
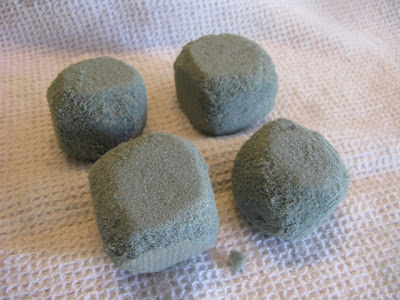
Use your thumb to push in all the edges and corners to round them. Spray paint the briquettes with silver or grey and black.
Use hot glue to glue all the briquettes to the bottom of the grill. Then it should look something like this. You could do more if you want. I mostly used them to cover up the washers.
Thanks to Apartment Therapy for this fun idea and tutorial. Come back later this week to see how to make a quick and easy grilling apron that will cost you less than $2.
Thanks for reading.
- Haley


I saw the original tutorial and linked over to yours that you made. You did a super job. I like the extras put into it. I guess it really depends on getting the right bowl.
ReplyDeletePopped over from Six Sisters link party.. This is JUST ADORABLE!!! I have seen so many furniture re-do tutorials on pinterest where you can make a play kitchen, and this would be an awesome alternative for a boy! Thanks for sharing!
ReplyDeleteSo creative. This would be so fun.
ReplyDeleteThis is such a great idea! I definitely be making this for our boys! Thank you for sharing on Saturday Show and Tell. I hope you'll join us again this week with some more great ideas!
ReplyDelete-Mackenzie
http://www.cheeriosandlattes.com
You've been featured on Saturday Show & Tell on Cheerios and Lattes this week! Thanks again for sharing! :)
DeleteMackenzie
brilliant! (stopping in from cheerios and lattes) am definately gonna go look for the tutorial!
ReplyDeleteI posted this on my new facebook page today...
ReplyDeleteThanks Ruth! I hope you enjoy making the grill!
DeleteThis is such a cute idea! Thank you for sharing the link to the tutorial.
ReplyDeleteSo fun! Also a good way to keep kids occupied while real grilling is going on without them getting too close to the hot grill.
ReplyDelete